
There are many times when you might want to sync critical customer records into CSV’s. Reasons might include:
- Backups.
- Contact cookie syncing with programmatic vendors such as LiveRamp, Kochava, TradeDesk.
- As a constant source for marketing teams to gather files from in order to sync to FB, TikTok, Twitter, Google audience builders.
Tutorial:
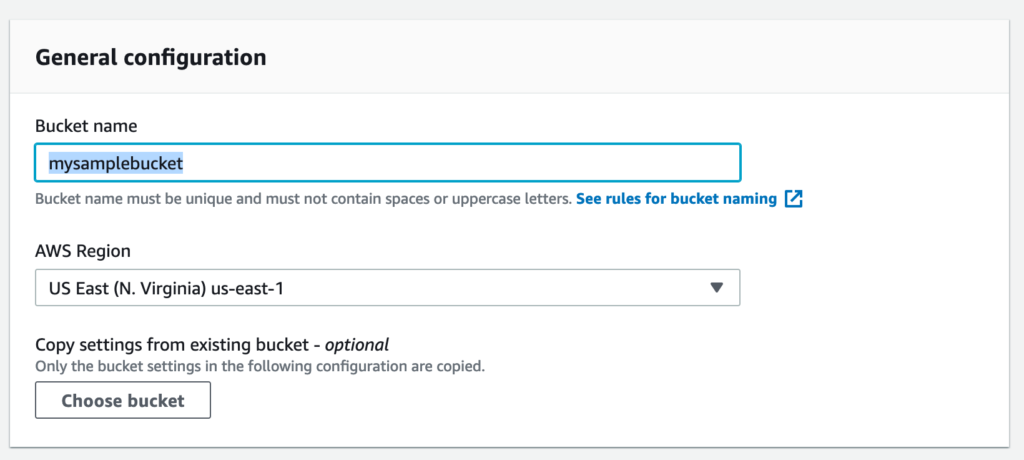
Navigate to AWS and go to your S3 service homepage. You will now need to create a bucket where you want your files to be stored within/ sync’d to.
Add your bucket name and select a region:
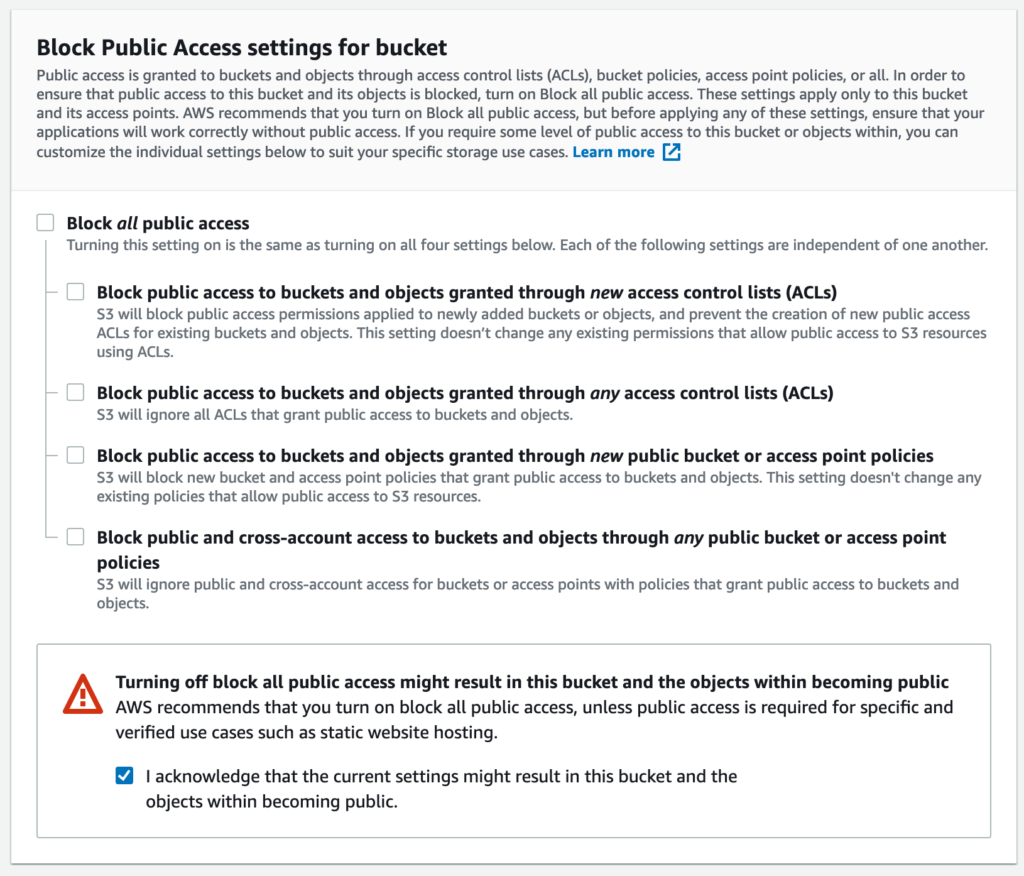
Turn off “Block all public access” and consent at the bottom where necessary (Alpine IQ is a 3rd party that will need access. We will restrict access via IAM policies shortly):
Next we will change the bucket policy. Under the permissions tab you will see a bucket policy section. Copy and paste the following JSON code into the bucket policy section. Please make sure to change your account ID + bucket names where the placeholders are:
– Placeholders are: yourAccountID and bucketName
{
"Version": "2012-10-17",
"Statement": [
{
"Sid": "DelegateS3Access",
"Effect": "Allow",
"Principal": {
"AWS": "arn:aws:iam::yourAccountID:root"
},
"Action": [
"s3:DeleteObject",
"s3:GetBucketLocation",
"s3:GetObject",
"s3:ListBucket",
"s3:PutObject"
],
"Resource": [
"arn:aws:s3:::bucketName”,
"arn:aws:s3:::bucketName/*"
]
}
]
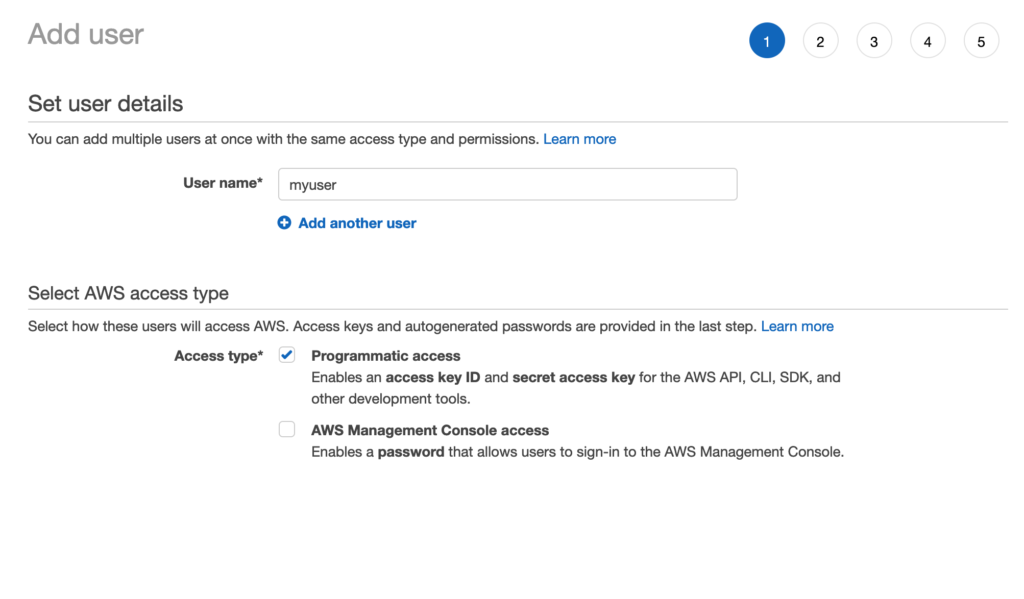
}After you save we will now go to the AWS “IAM” service to add your user that will have access to this bucket. Go there now, then head to the users section in the left navigation bar. Click on “Add user” and select programmatic access. Please note that if you are just going to use this for Alpine IQ, go ahead and make the user “alpineiq” so that it is easier to track and control your security protocols. Please download the access key + access secret credentials when you have completed creating this user. You will need it at the end of this tutorial.
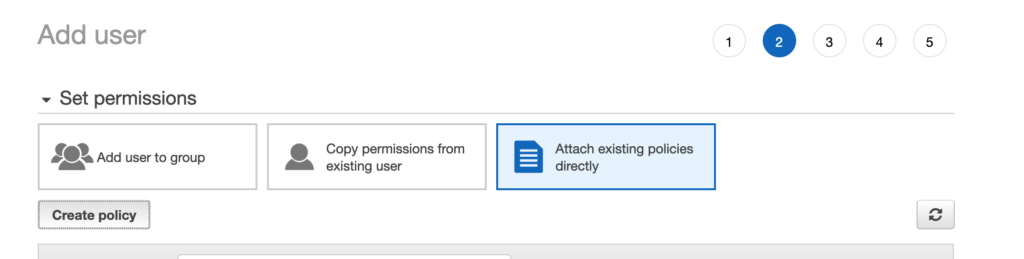
On Step 2 you will select “Attach existing policies directly” and then click the button in the lower-left corner “Create Policy”.
Then select “JSON” in the tabs from the new window that opens:
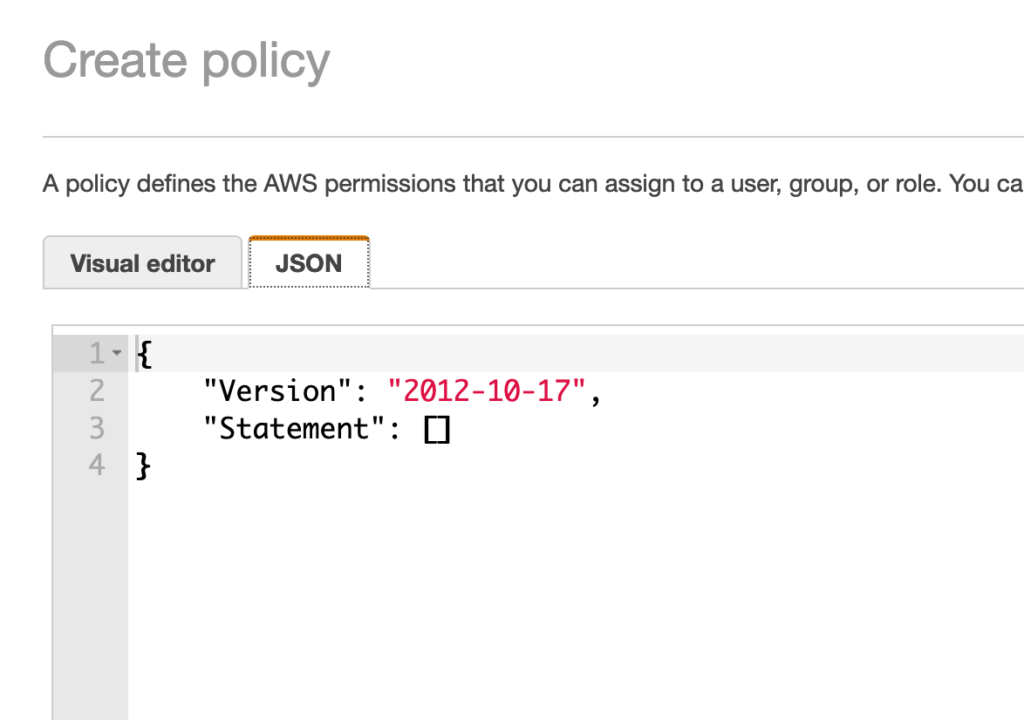
Copy and paste the following JSON. Make sure to replace your bucket names where applicable:
{
    "Version": "2012-10-17",
    "Statement": [
        {
            "Sid": "VisualEditor0",
            "Effect": "Allow",
            "Action": [
                "s3:PutObject",
                "s3:GetObject",
                "s3:ListBucket",
                "s3:DeleteObject",
                "s3:GetBucketLocation",
                "s3:PutObjectAcl"
            ],
            "Resource": [
                "arn:aws:s3:::sampleBucket",
                "arn:aws:s3:::sampleBucket/*"
            ]
        }
    ]
}
Congratulations! Your bucket is now setup for us to sync to it. You can make other IAM users to allow 3rd parties access to your backups.
Now all you need to do is head into Alpine IQ and connect AWS S3 as a destination. When connecting your integration you will need the access key + secret for the IAM user + the bucket name and region for us to access. Your CSV files will automatically sync to this bucket by default every 4 hours.
Bucket          // bucket name
Region          // region bucket was created in
AccessKeyID     // your new user's access ID
SecretAccessKey // your new user's secret access key
To get the latest updates on our suite of services, make sure to subscribe to our blog today!


Leave a Comment